Reports You Should Utilize During Your Onboarding Process

As an Onboarding Coach, my job is to help make new customer’s transition to Zen Planner go as smooth as possible. In a recent post, I shared my insider tips on making this transition a little easier. The box that I coach at recently switched from another solution to Zen Planner, so I was able to experience the transfer process firsthand.
In addition to my insider tips, there are several reports offered within our solution that were specifically designed to help you during your transfer process. Here are my four favorite reports that I recommend using during your transition to Zen Planner.
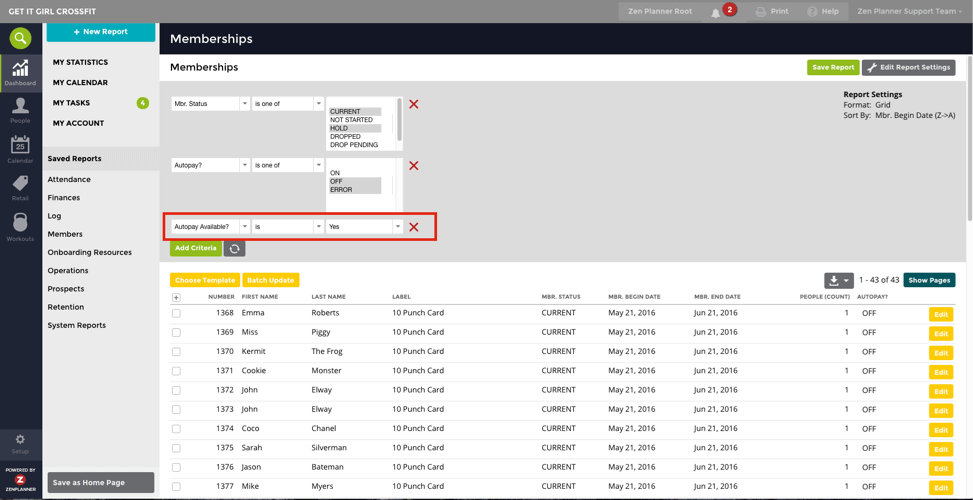
1. Memberships with Auto-Pay OFF
Recurring automated billing is a great way to minimize legwork, decrease late payments and improve relationships with your members. Our system offers a helpful report that will show you all the memberships at your gym that do not have auto-pay turned on. Within this report, you can add additional criteria to see if a member has a bank account or credit card on file so that you can easily turn on auto-pay.
When to use this report in the Onboarding process: After the Membership Import, once you have added in your member’s payment information.
How to access this report: Dashboard > Membership with AutoPay OFF (Manual) report. To pull in criteria to show if there is an existing account on-file, click add criteria > “Account Available? — is — Yes”, then refresh your report.
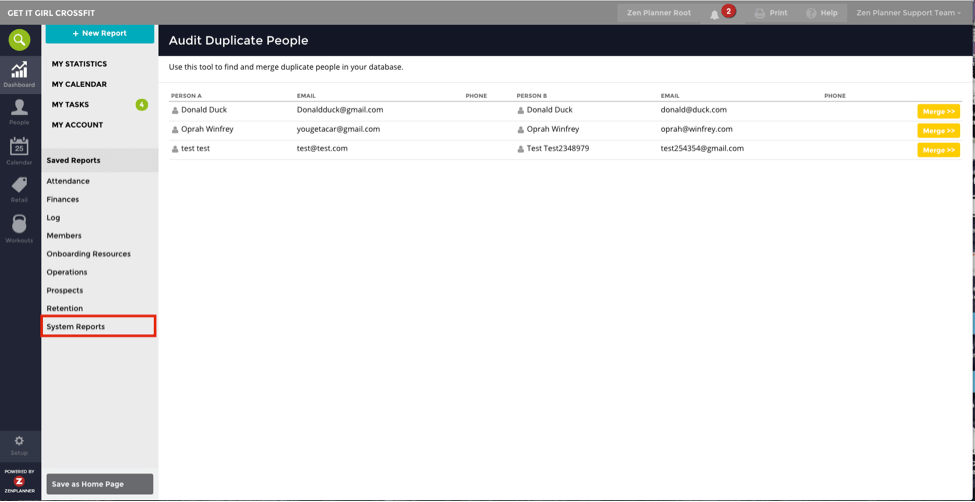
 2. Duplicate People Report
If you are importing a large list of members, prospects and alumni into your Zen Planner database, utilize this report to ensure that each individual only has one profile
When to use this report in the Onboarding process: Immediately after your People Import.
How to access this report: Dashboard > Saved Reports > System Reports > Audit Duplicate People
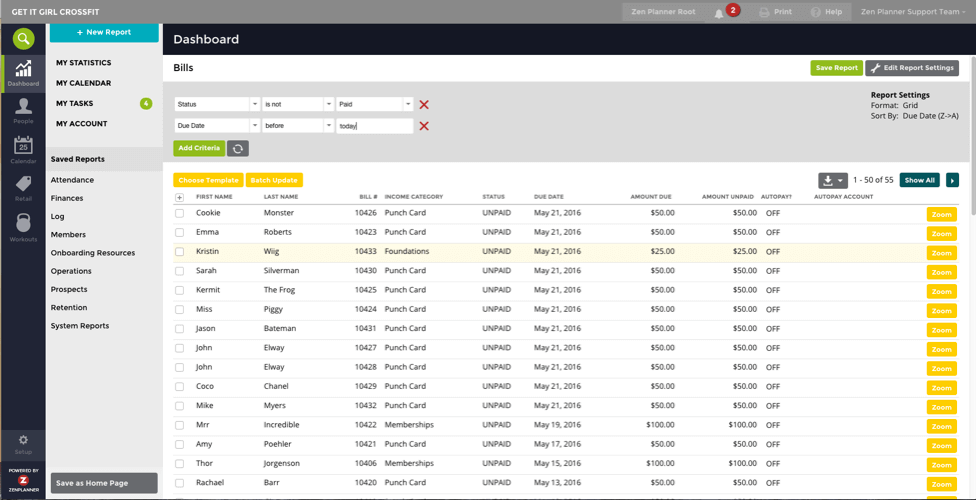
 3. Past Due (Total) Report
This report will help you clear out all of your “unpaid bills” in a single batch. When you import memberships or add memberships to each current members’ profile, Zen Planner will add the bill associated with that membership to their profile, which is what you want. However, if a member already paid for the current month in your previous system, you will want to either mark those bills as paid (if you are going to report on them in Zen Planner), or delete them if you are reporting on them in your previous system.
When to use this report in the Onboarding process: After you add each individual’s membership to their profile, but before you turn on “Member Privileges” and give them access to login. If you give them their username and password before you take care of this important step, a client that doesn’t owe anything will log in and see that they owe their past membership, which isn’t ideal.
How to access this report: Dashboard > Scroll down until you see the Financial Section > click on the Past Due (Total) report
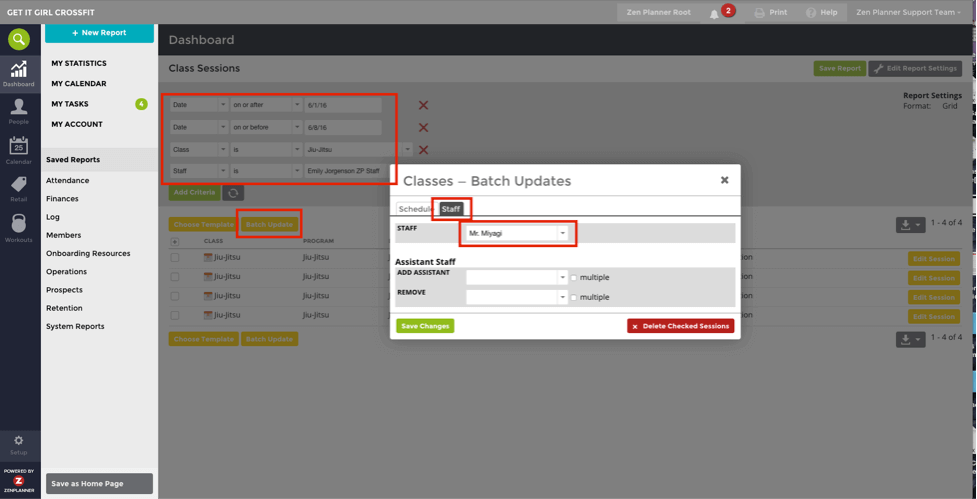
 4. Class Sessions Report
When scheduling classes, one of the hiccups I often see is when a class schedule rotates staff every month. You can use a Class Sessions Report to batch update staff members without having to update each individual session. Using this report will also ensure that you don’t have to mess with the macro class setting.
When to use this report in the Onboarding process: We recommend using this report when you are ready to start scheduling your staff for classes.
How to access this report: Dashboard > + New Report > Class Sessions. Adjust the date to the timeframe you’re looking at, then Add Criteria and select the staff member you wish to switch. Select all the classes you wish to adjust. Then click “Batch Update” on the “Staff” tab, select the staff member that will be instructing the class and “Save Changes”.
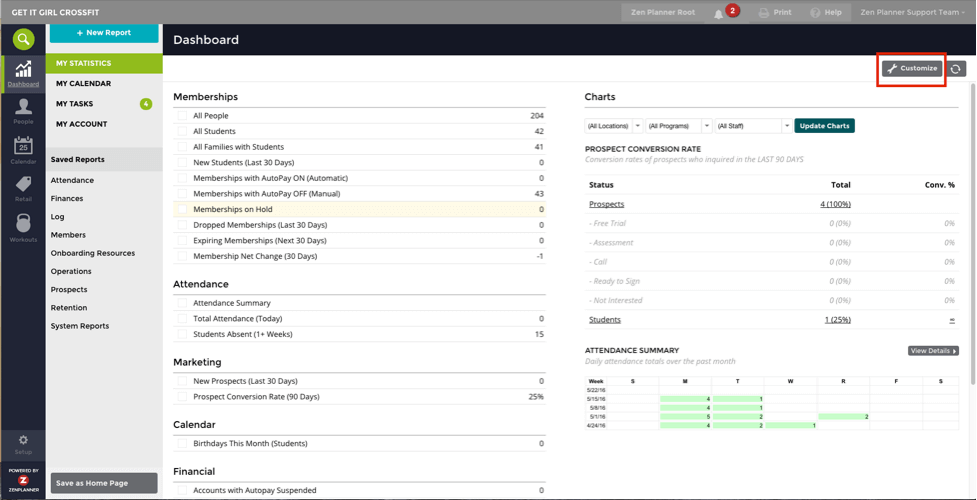
Additional Tip: Customize your Dashboard
You can also customize your dashboard to reflect only the reports that are most important to you. From your Dashboard, click “Customize” on the top right corner. You’ll notice the tabs on the top match the different sections of your main dashboard. You can hide (by unselecting) or show hidden reports (by checking the box) on your main dashboard. A popular tab is the Charts Tab, which shows attendance and conversion information in a more visual representation so you can see the bigger picture and quickly spot trends.
We have one more insider tip to help you make the most out of your Onboarding experience. Don’t forget to click on the notifications icon (the bell in the top right portion of your screen) to get the latest updates on feature additions and important news.
As someone who has been through this firsthand, I can promise you that utilizing these reports will significantly simplify your data transfer process to Zen Planner. If you run into any questions during this process, know that Onboarding Coaches, like myself, are here to help!
Evaluating member management software providers? Make sure they offer free Onboarding and more by download our helpful checklist, 9 Things Your Gym Management Software Must Have.


I’m Coach Kelli, a devoted CrossFit gym owner with 15 years of experience managing my facility, along with owning yoga studios and wellness centers. Beyond the fitness world, I have a passion for cooking, cherish moments with my children and family, and find joy in spending time outside. Having experienced the highs and lows, I’m dedicated to leveraging my expertise to help you grow and succeed on your fitness journey.
About the Author: Kelli Sweeting


I’m Coach Kelli, a devoted CrossFit gym owner with 15 years of experience managing my facility, along with owning yoga studios and wellness centers. Beyond the fitness world, I have a passion for cooking, cherish moments with my children and family, and find joy in spending time outside. Having experienced the highs and lows, I’m dedicated to leveraging my expertise to help you grow and succeed on your fitness journey.


