Introducing the All-In-One Chat Widget for Your Gym’s Website

What’s New – All Your Chats, One Widget
The new All-In-One Chat Widget consolidates live chat, email chat, and WhatsApp into a single, seamless communication tool for your gym’s website.
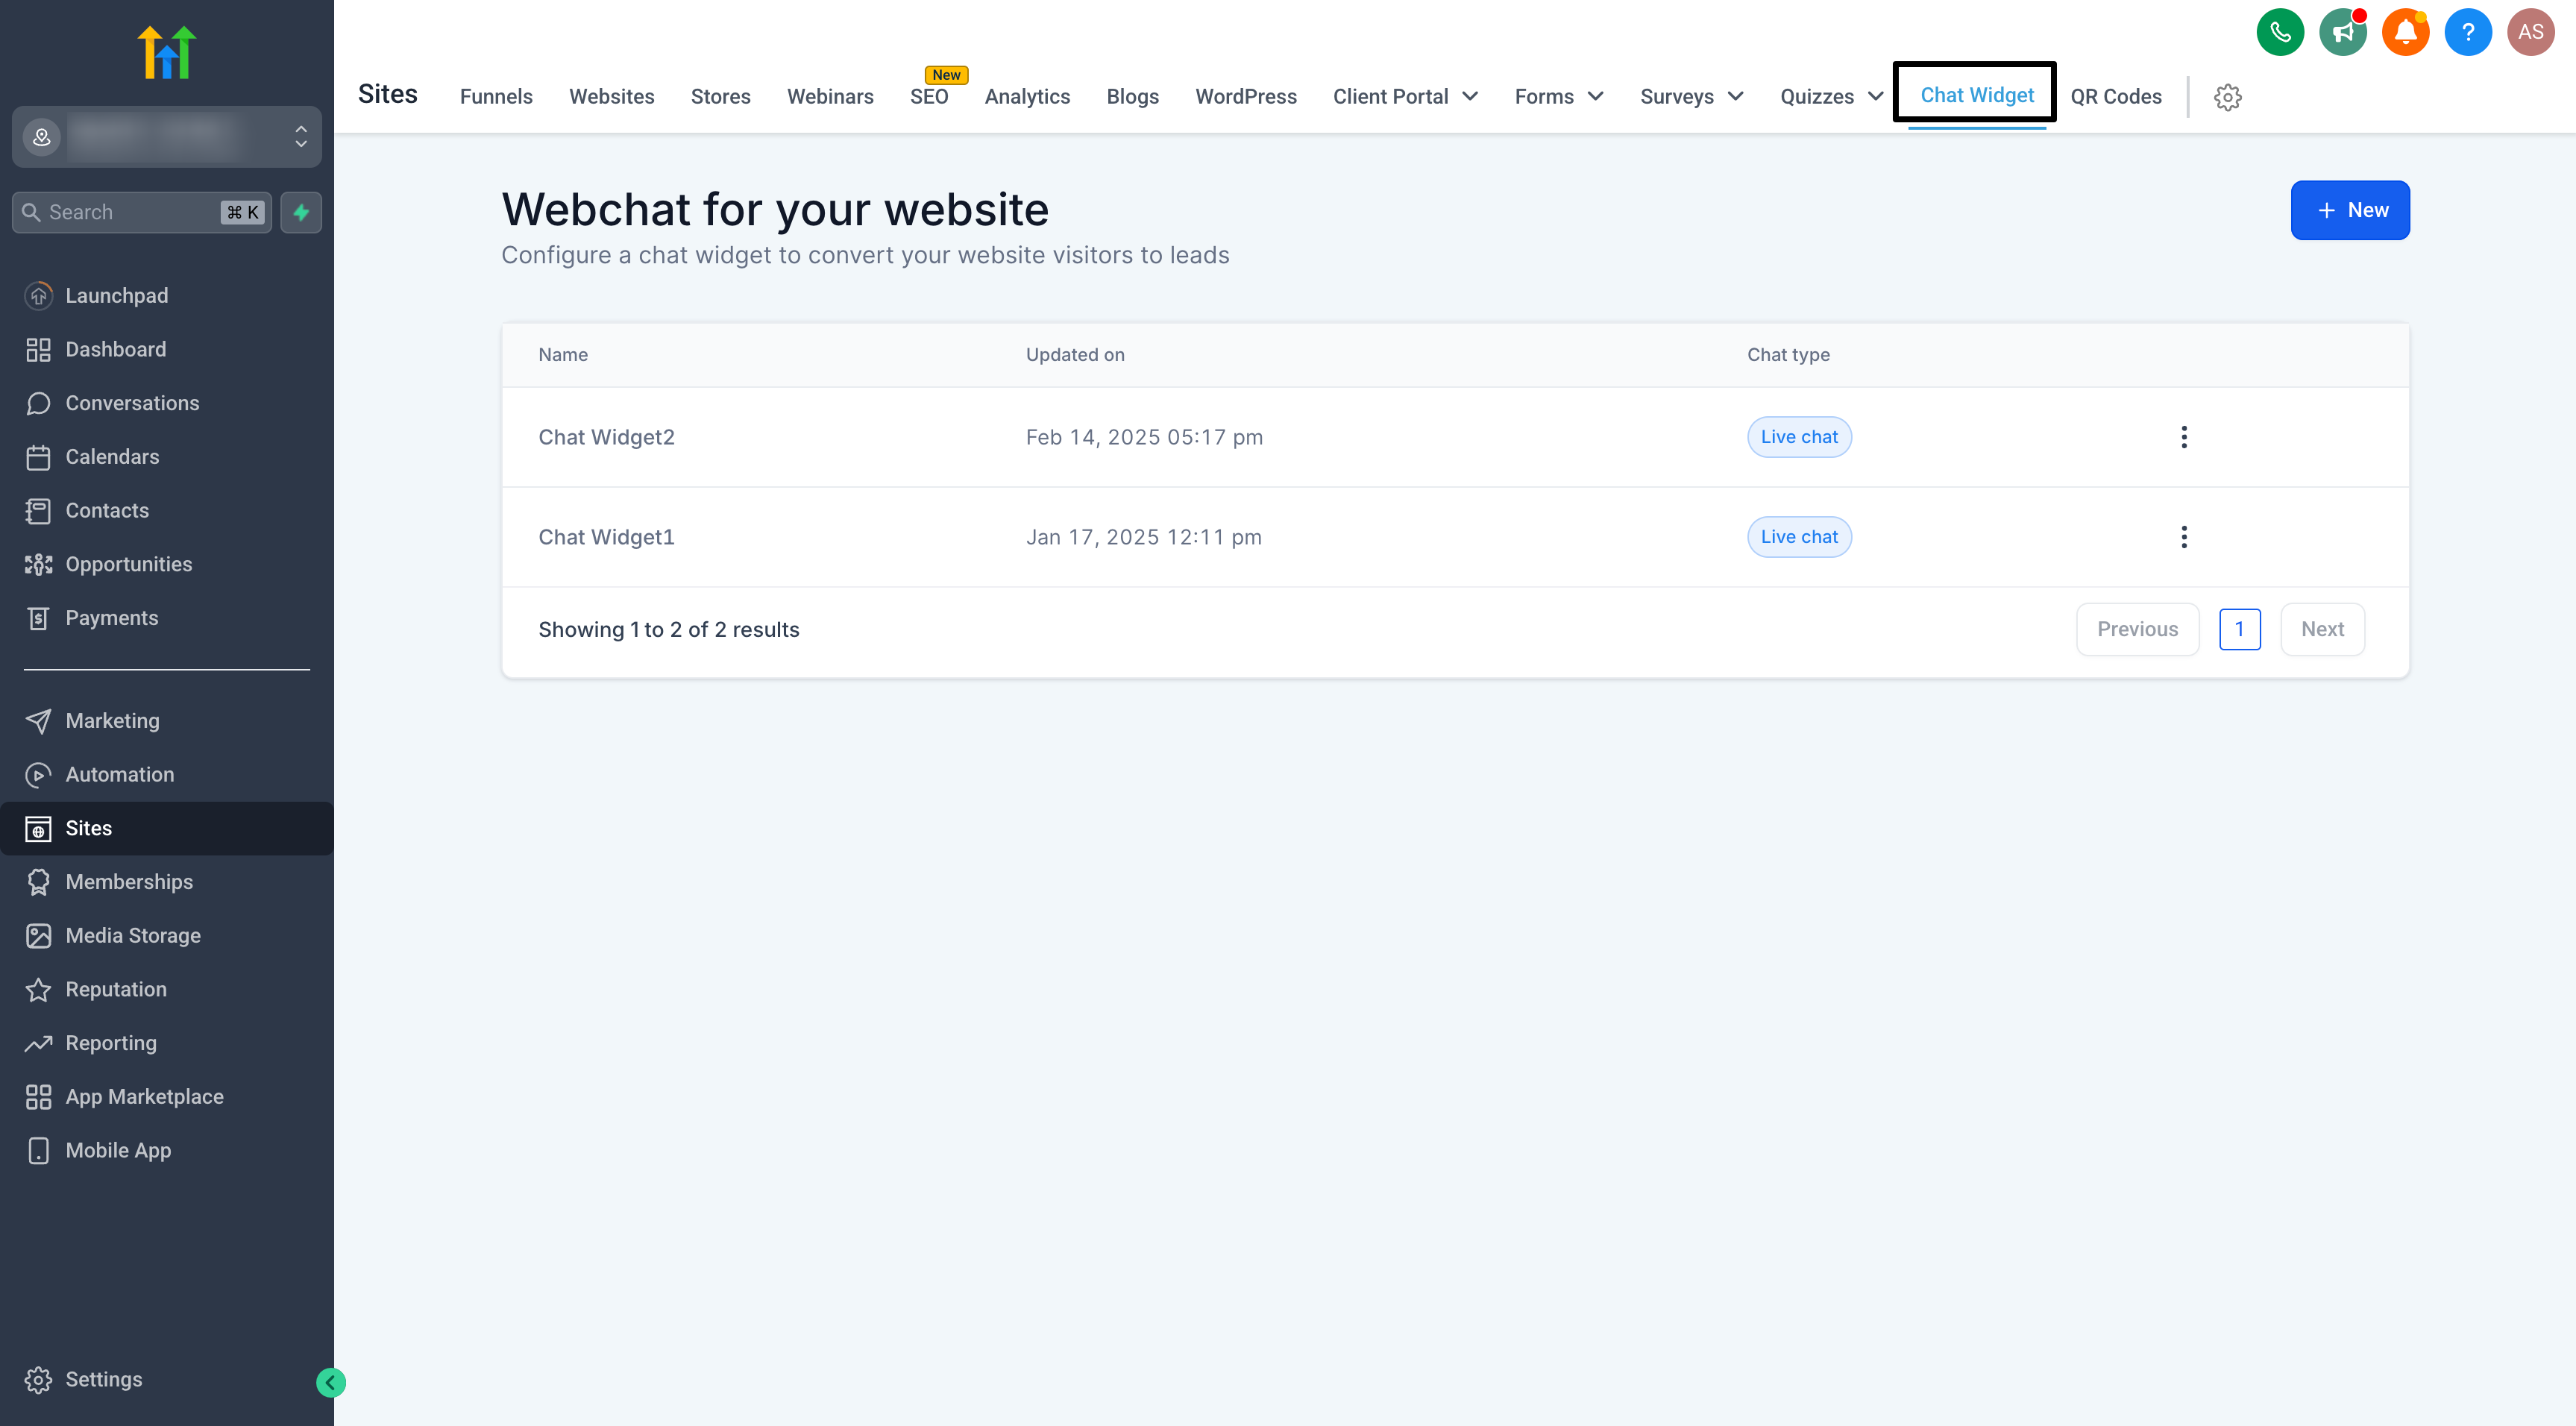
Where to Find It:
Sites → Chat Widget → All-In-One Chat → Select Channels → Publish.

Now, prospective members can reach you however they prefer—without switching apps or hunting down your contact information.
Why It Matters
One Widget, More Conversations
- Consolidated Communication: Manage live chat, email, and WhatsApp from one place.
- Quick Responses: Answer membership questions, schedule tours, or close deals faster.
- Higher Conversions: Reduce friction, capture interest when it’s at its peak.
Benefit to Gyms
When prospects can start a conversation instantly—without waiting for email replies or navigating clunky forms—you win more members and drive faster sign-ups.
Real-World Use Cases
- A lead is browsing your class schedule? Ping them directly via live chat.
- A member wants to ask about a personal training package? WhatsApp message = closed sale.
- A busy parent has a quick question after hours? Email chat picks it up seamlessly.
Visual Walkthrough
- Navigate to the Chat Widget Section
- Log in to your account.
- In the left-hand navigation menu, go to Sites → Chat Widget.
- Create a New Chat Widget & then choose All-in-One Chat from the list of chat types.
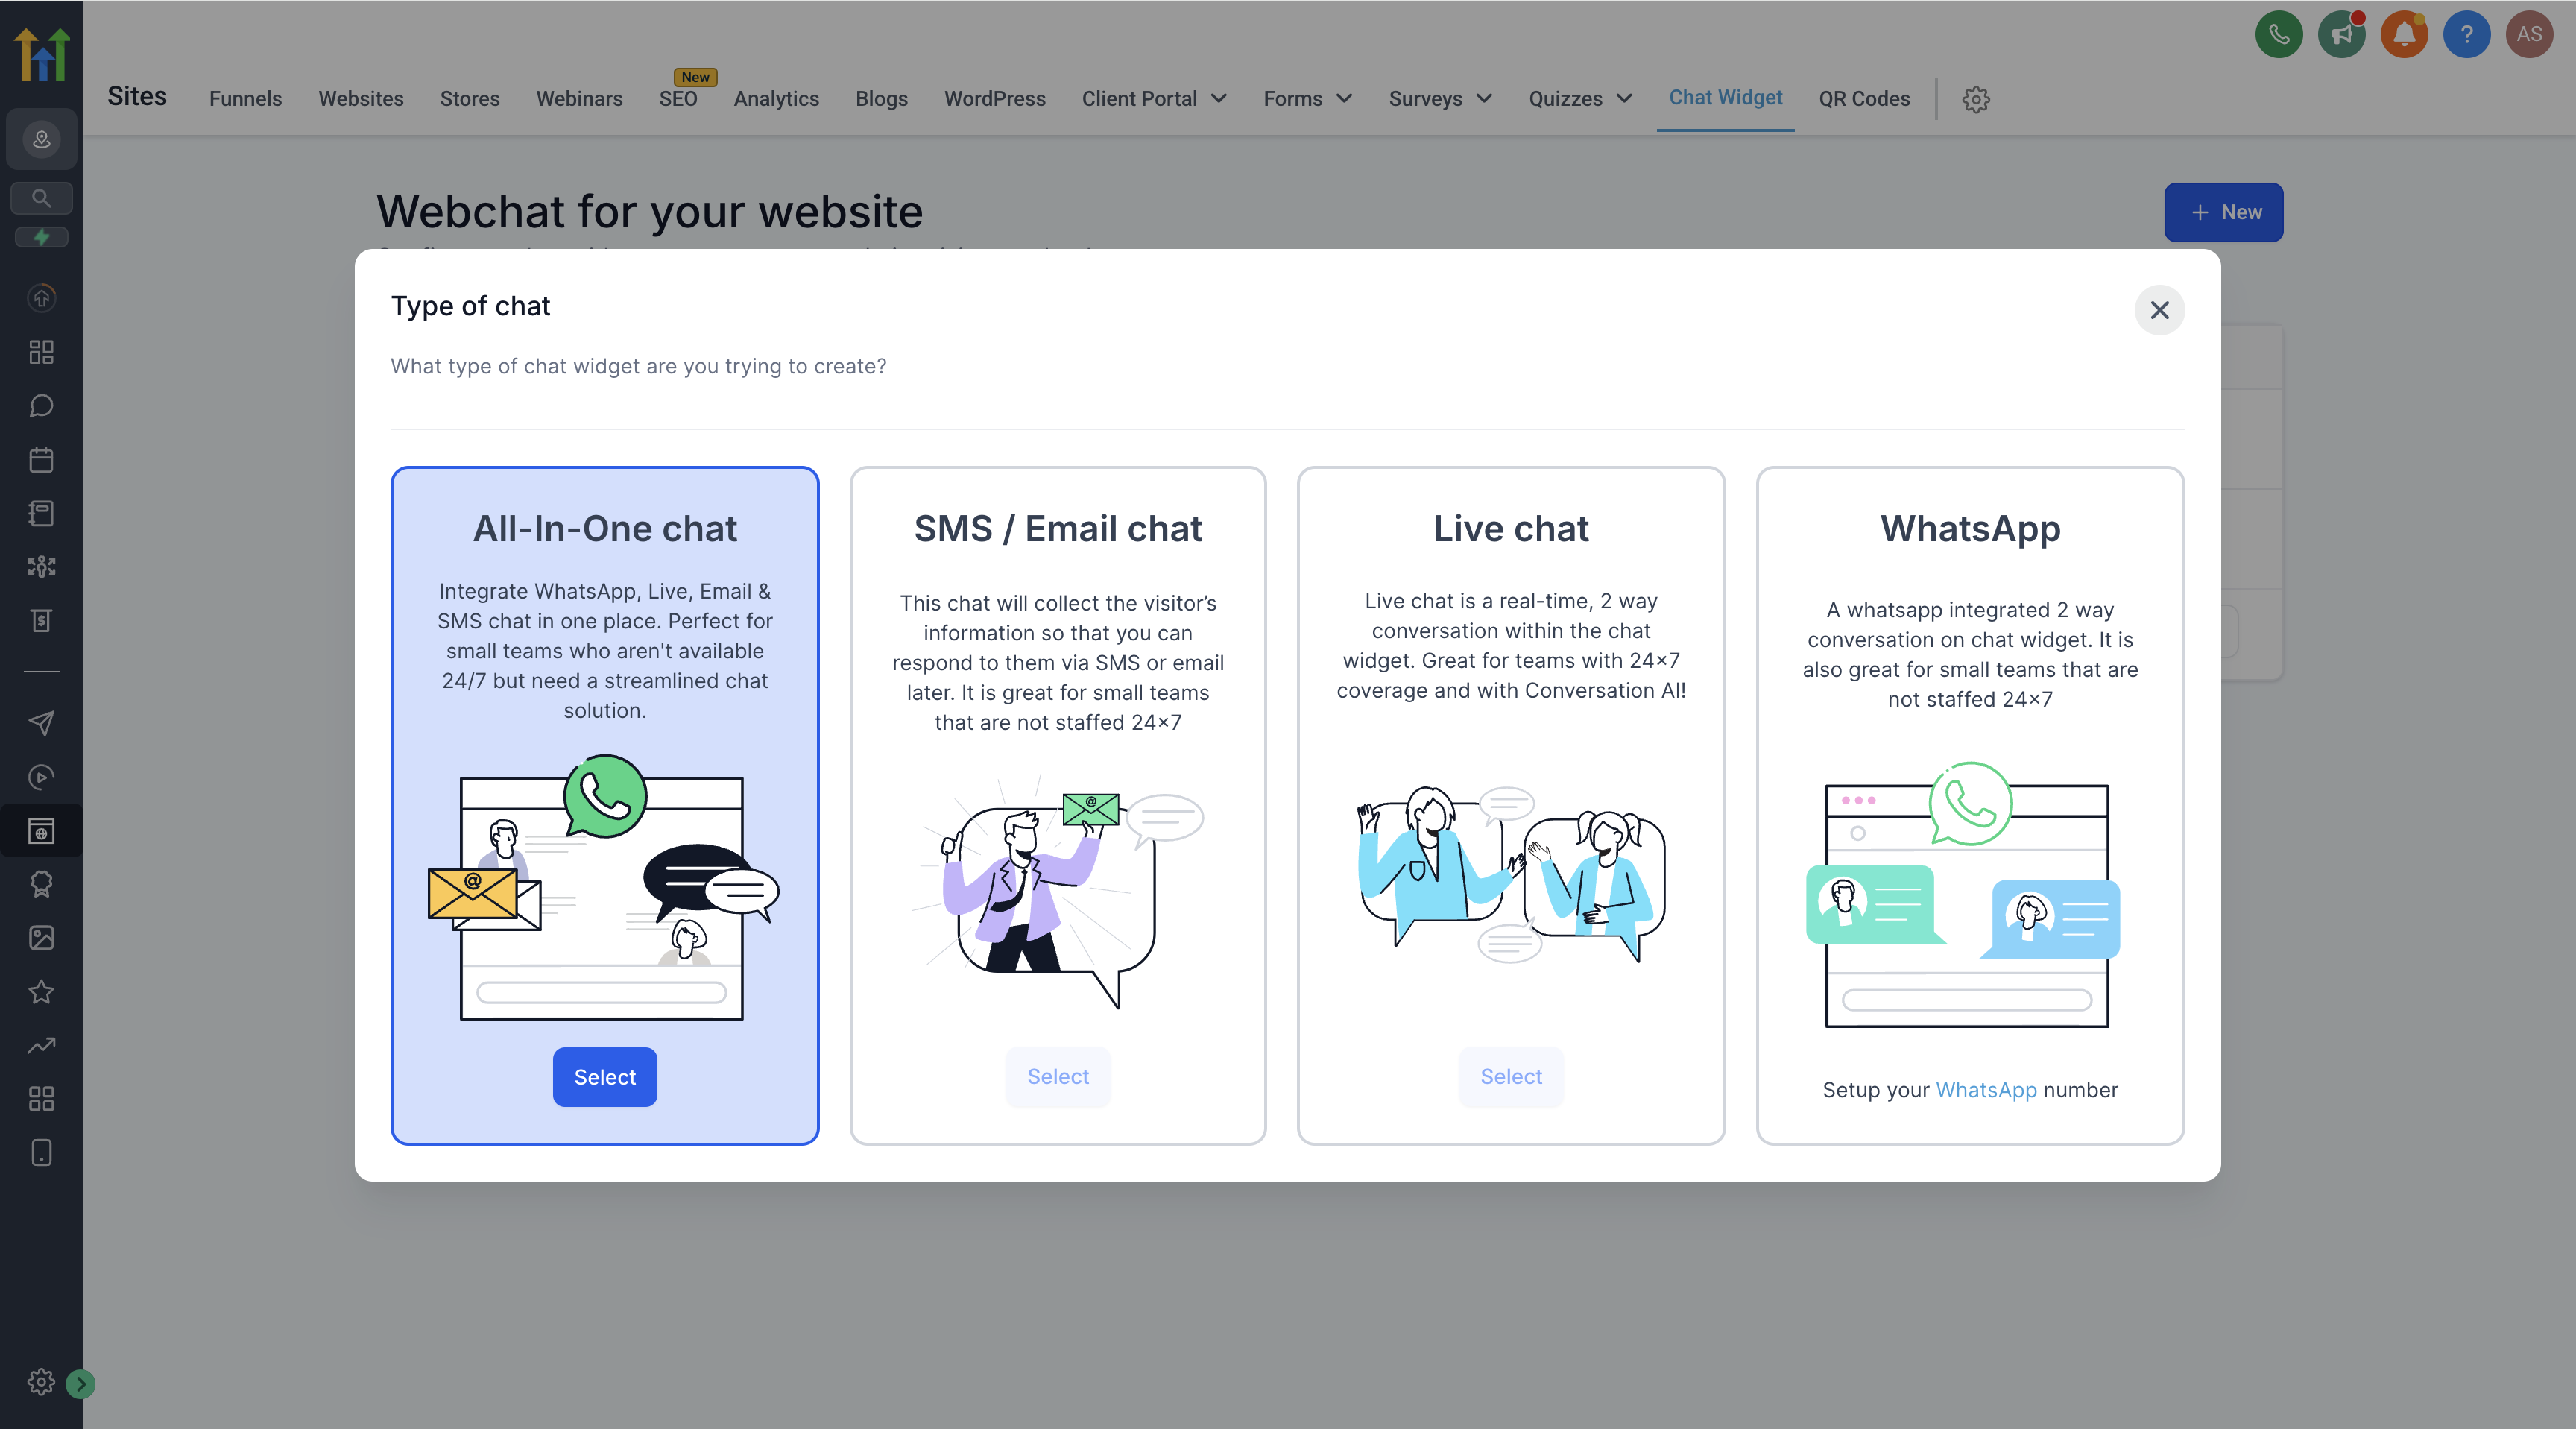
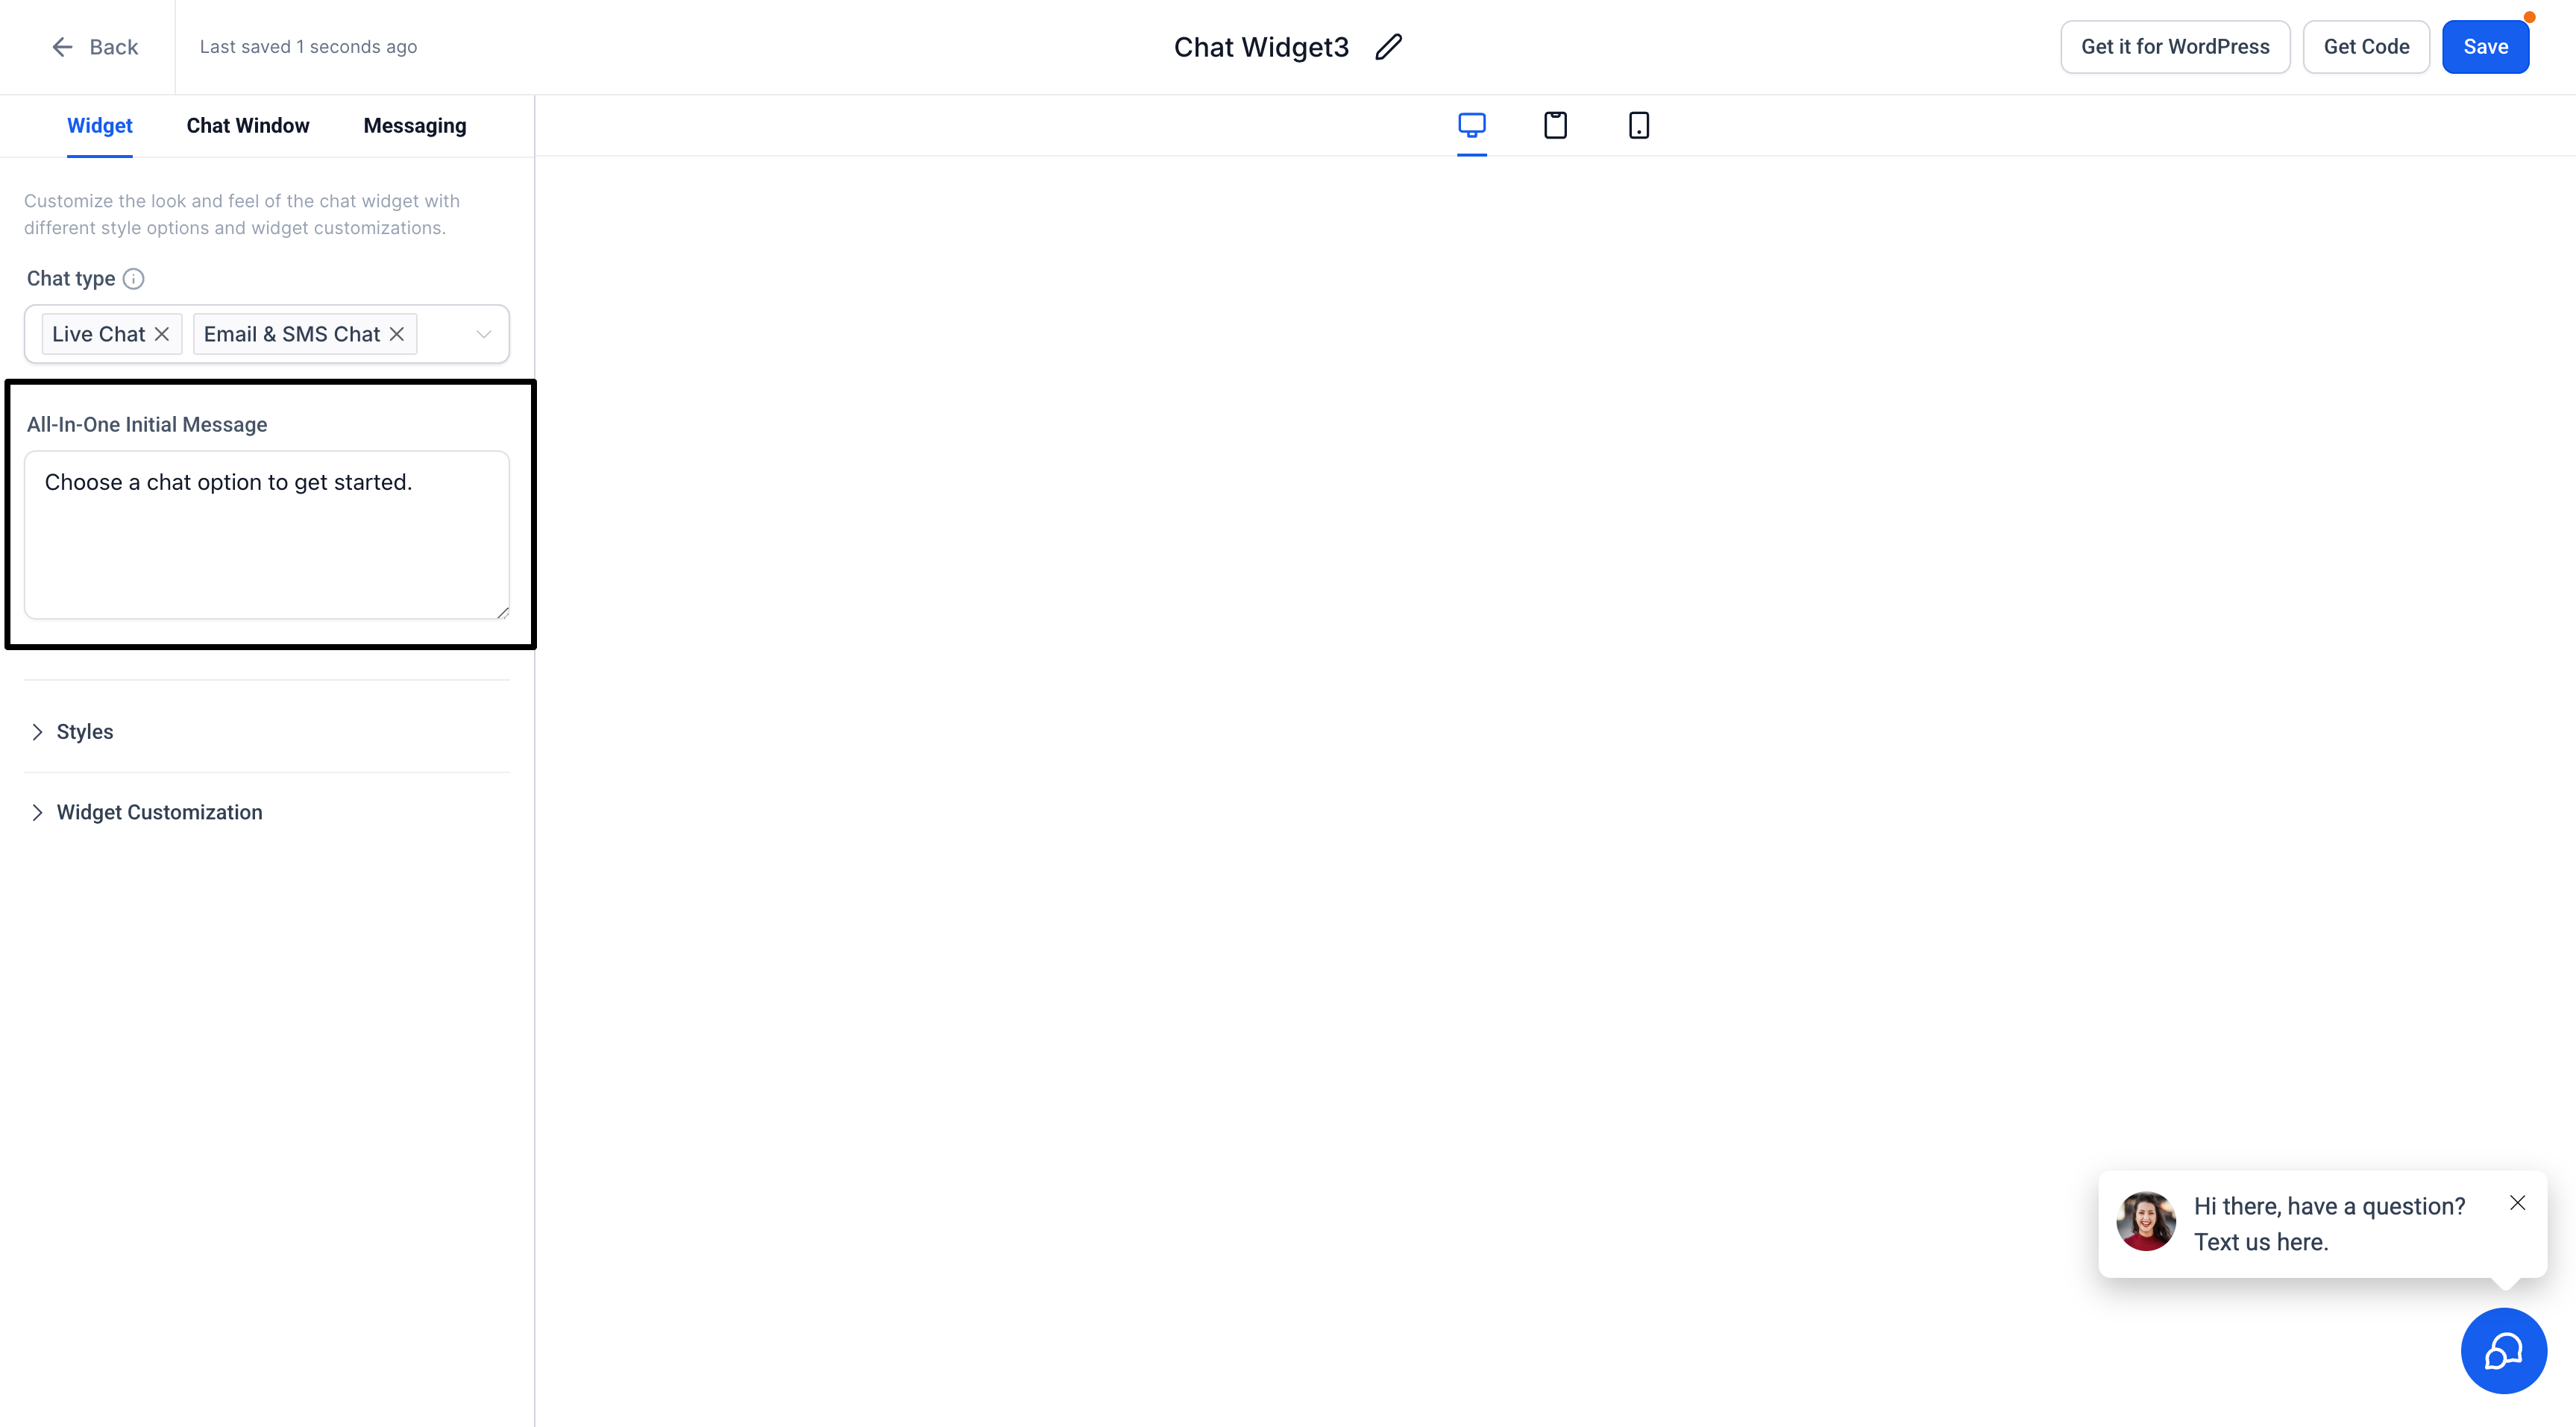
Note: If you do not see “All-in-One Chat,” ensure your account has access to the latest updates. You may need to refresh or log out and log back in. - Select Channels
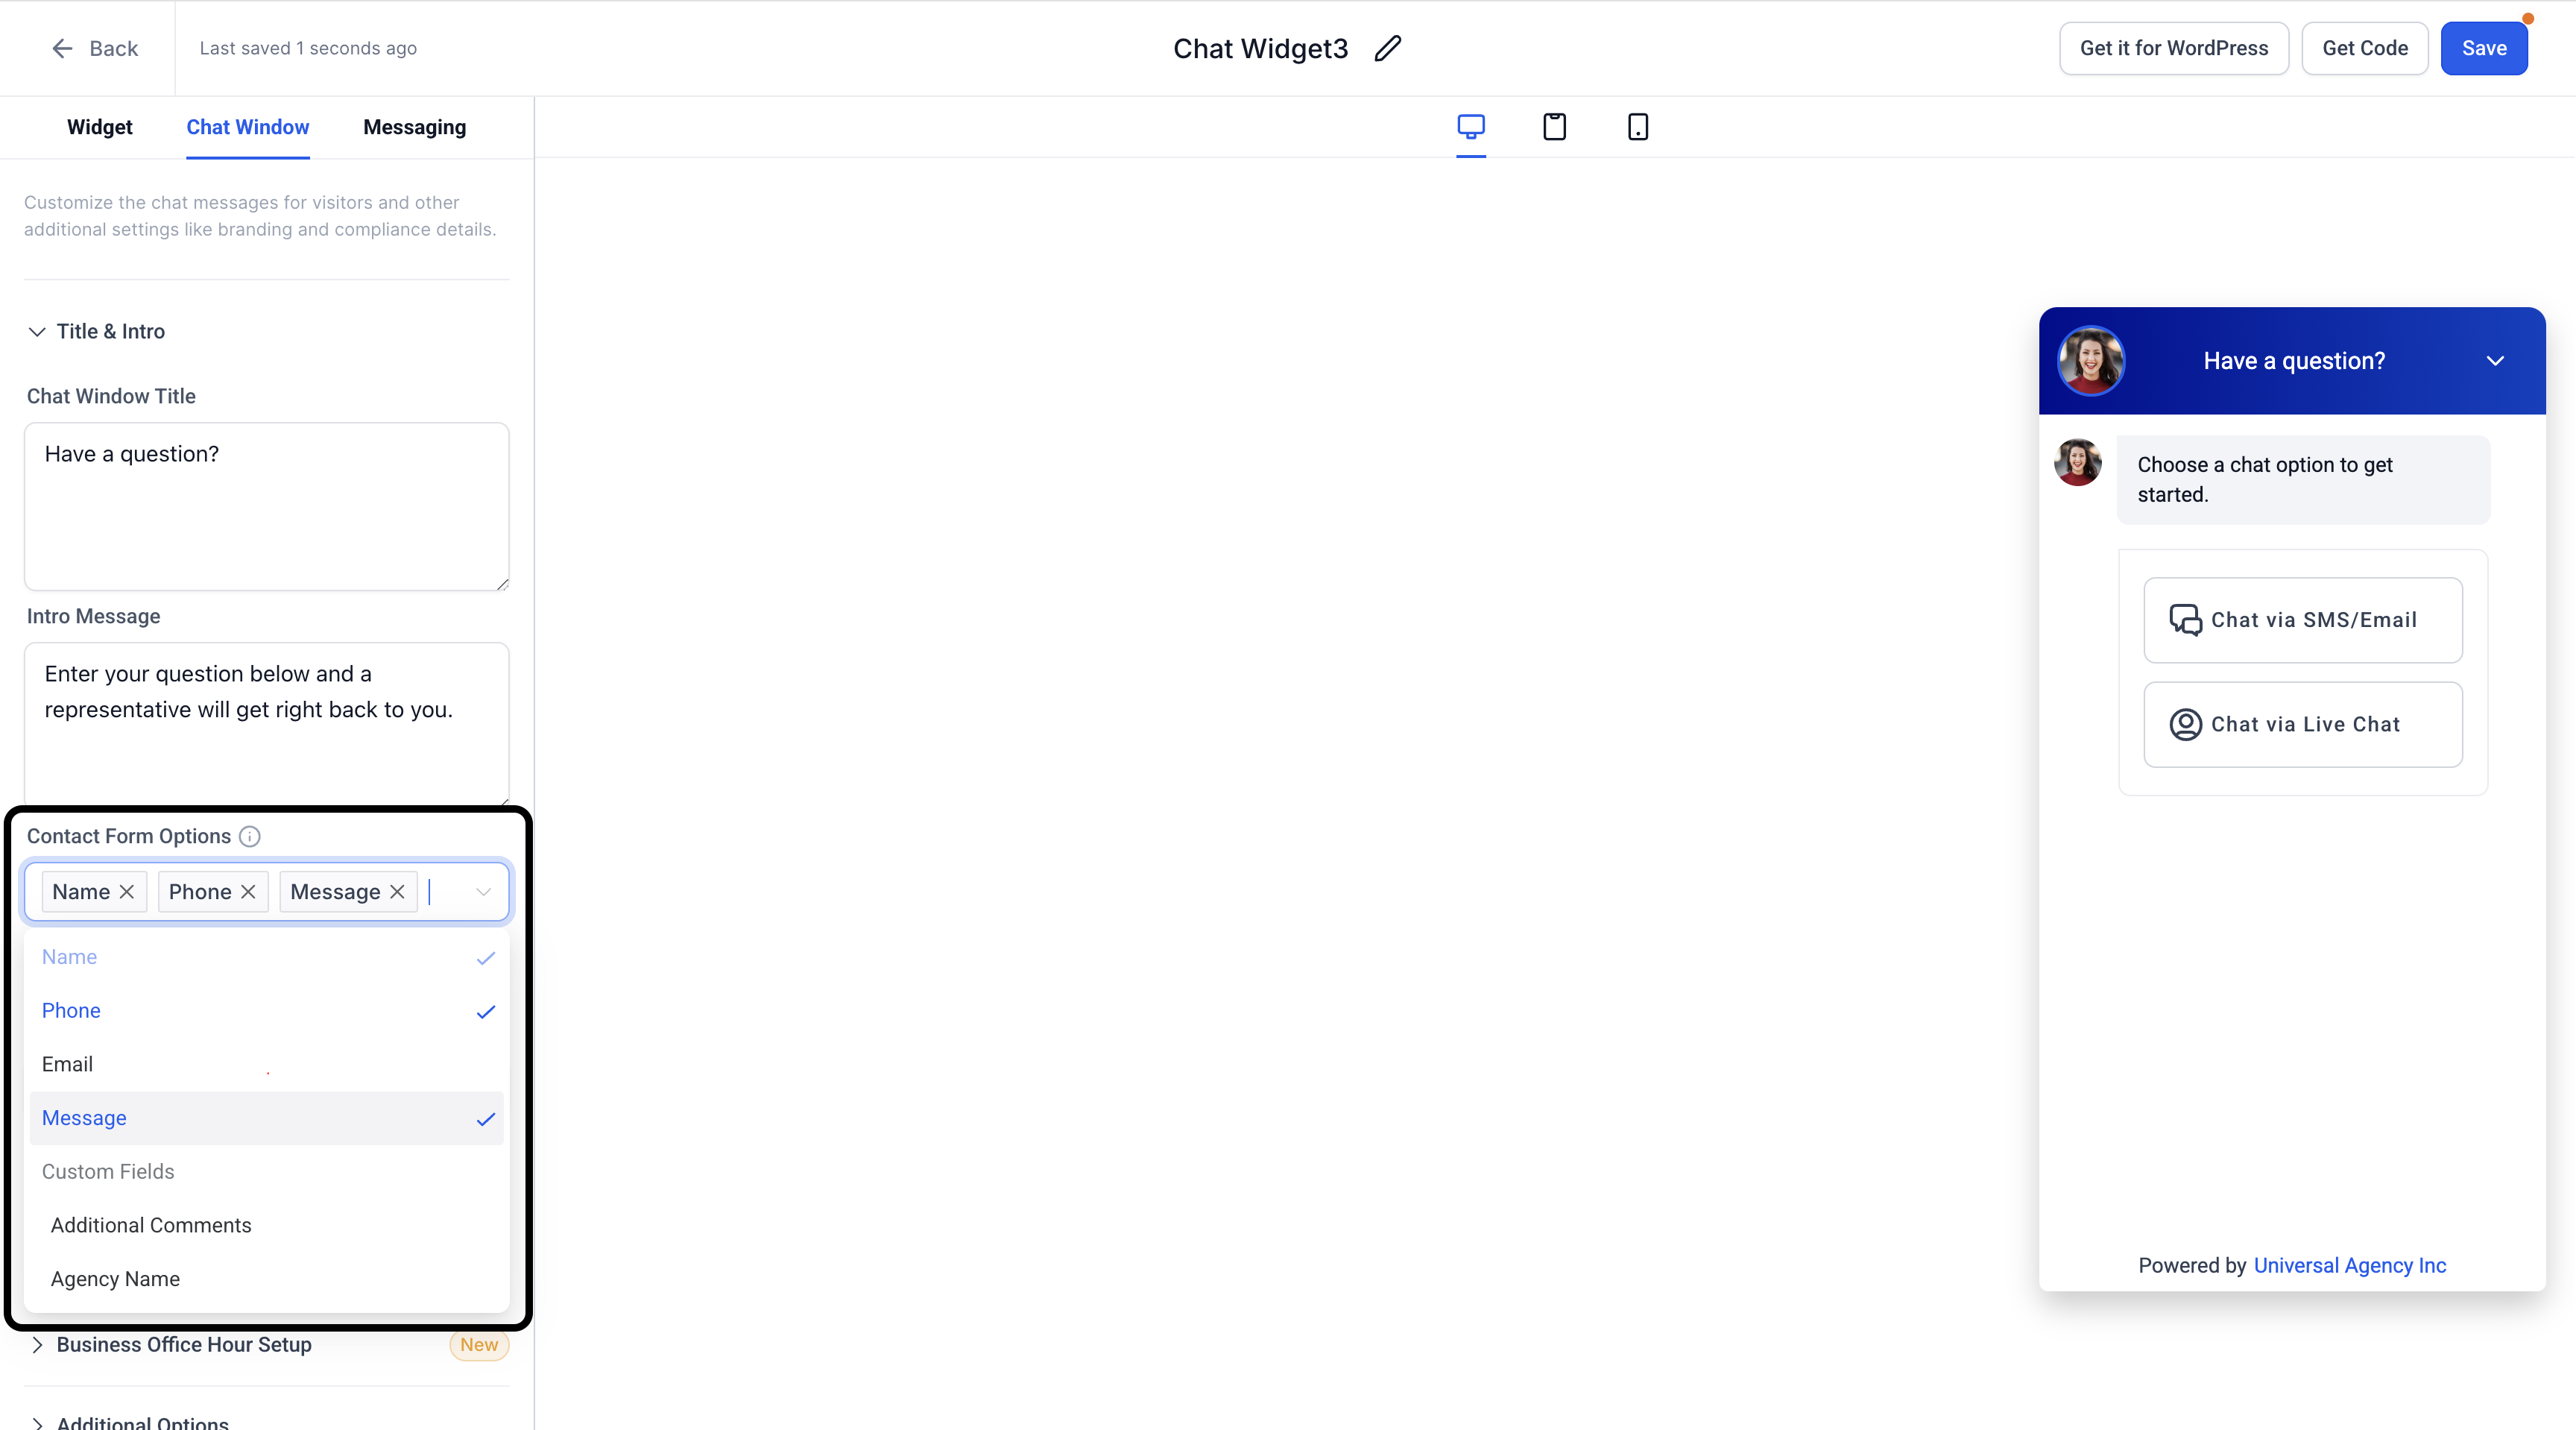
- Once you’ve chosen All-in-One Chat, you’ll be prompted to pick which channels you want to enable.
- If you have an active WhatsApp number, you can enable WhatsApp Chat. If not, only Live Chat and Email Chat will be available.
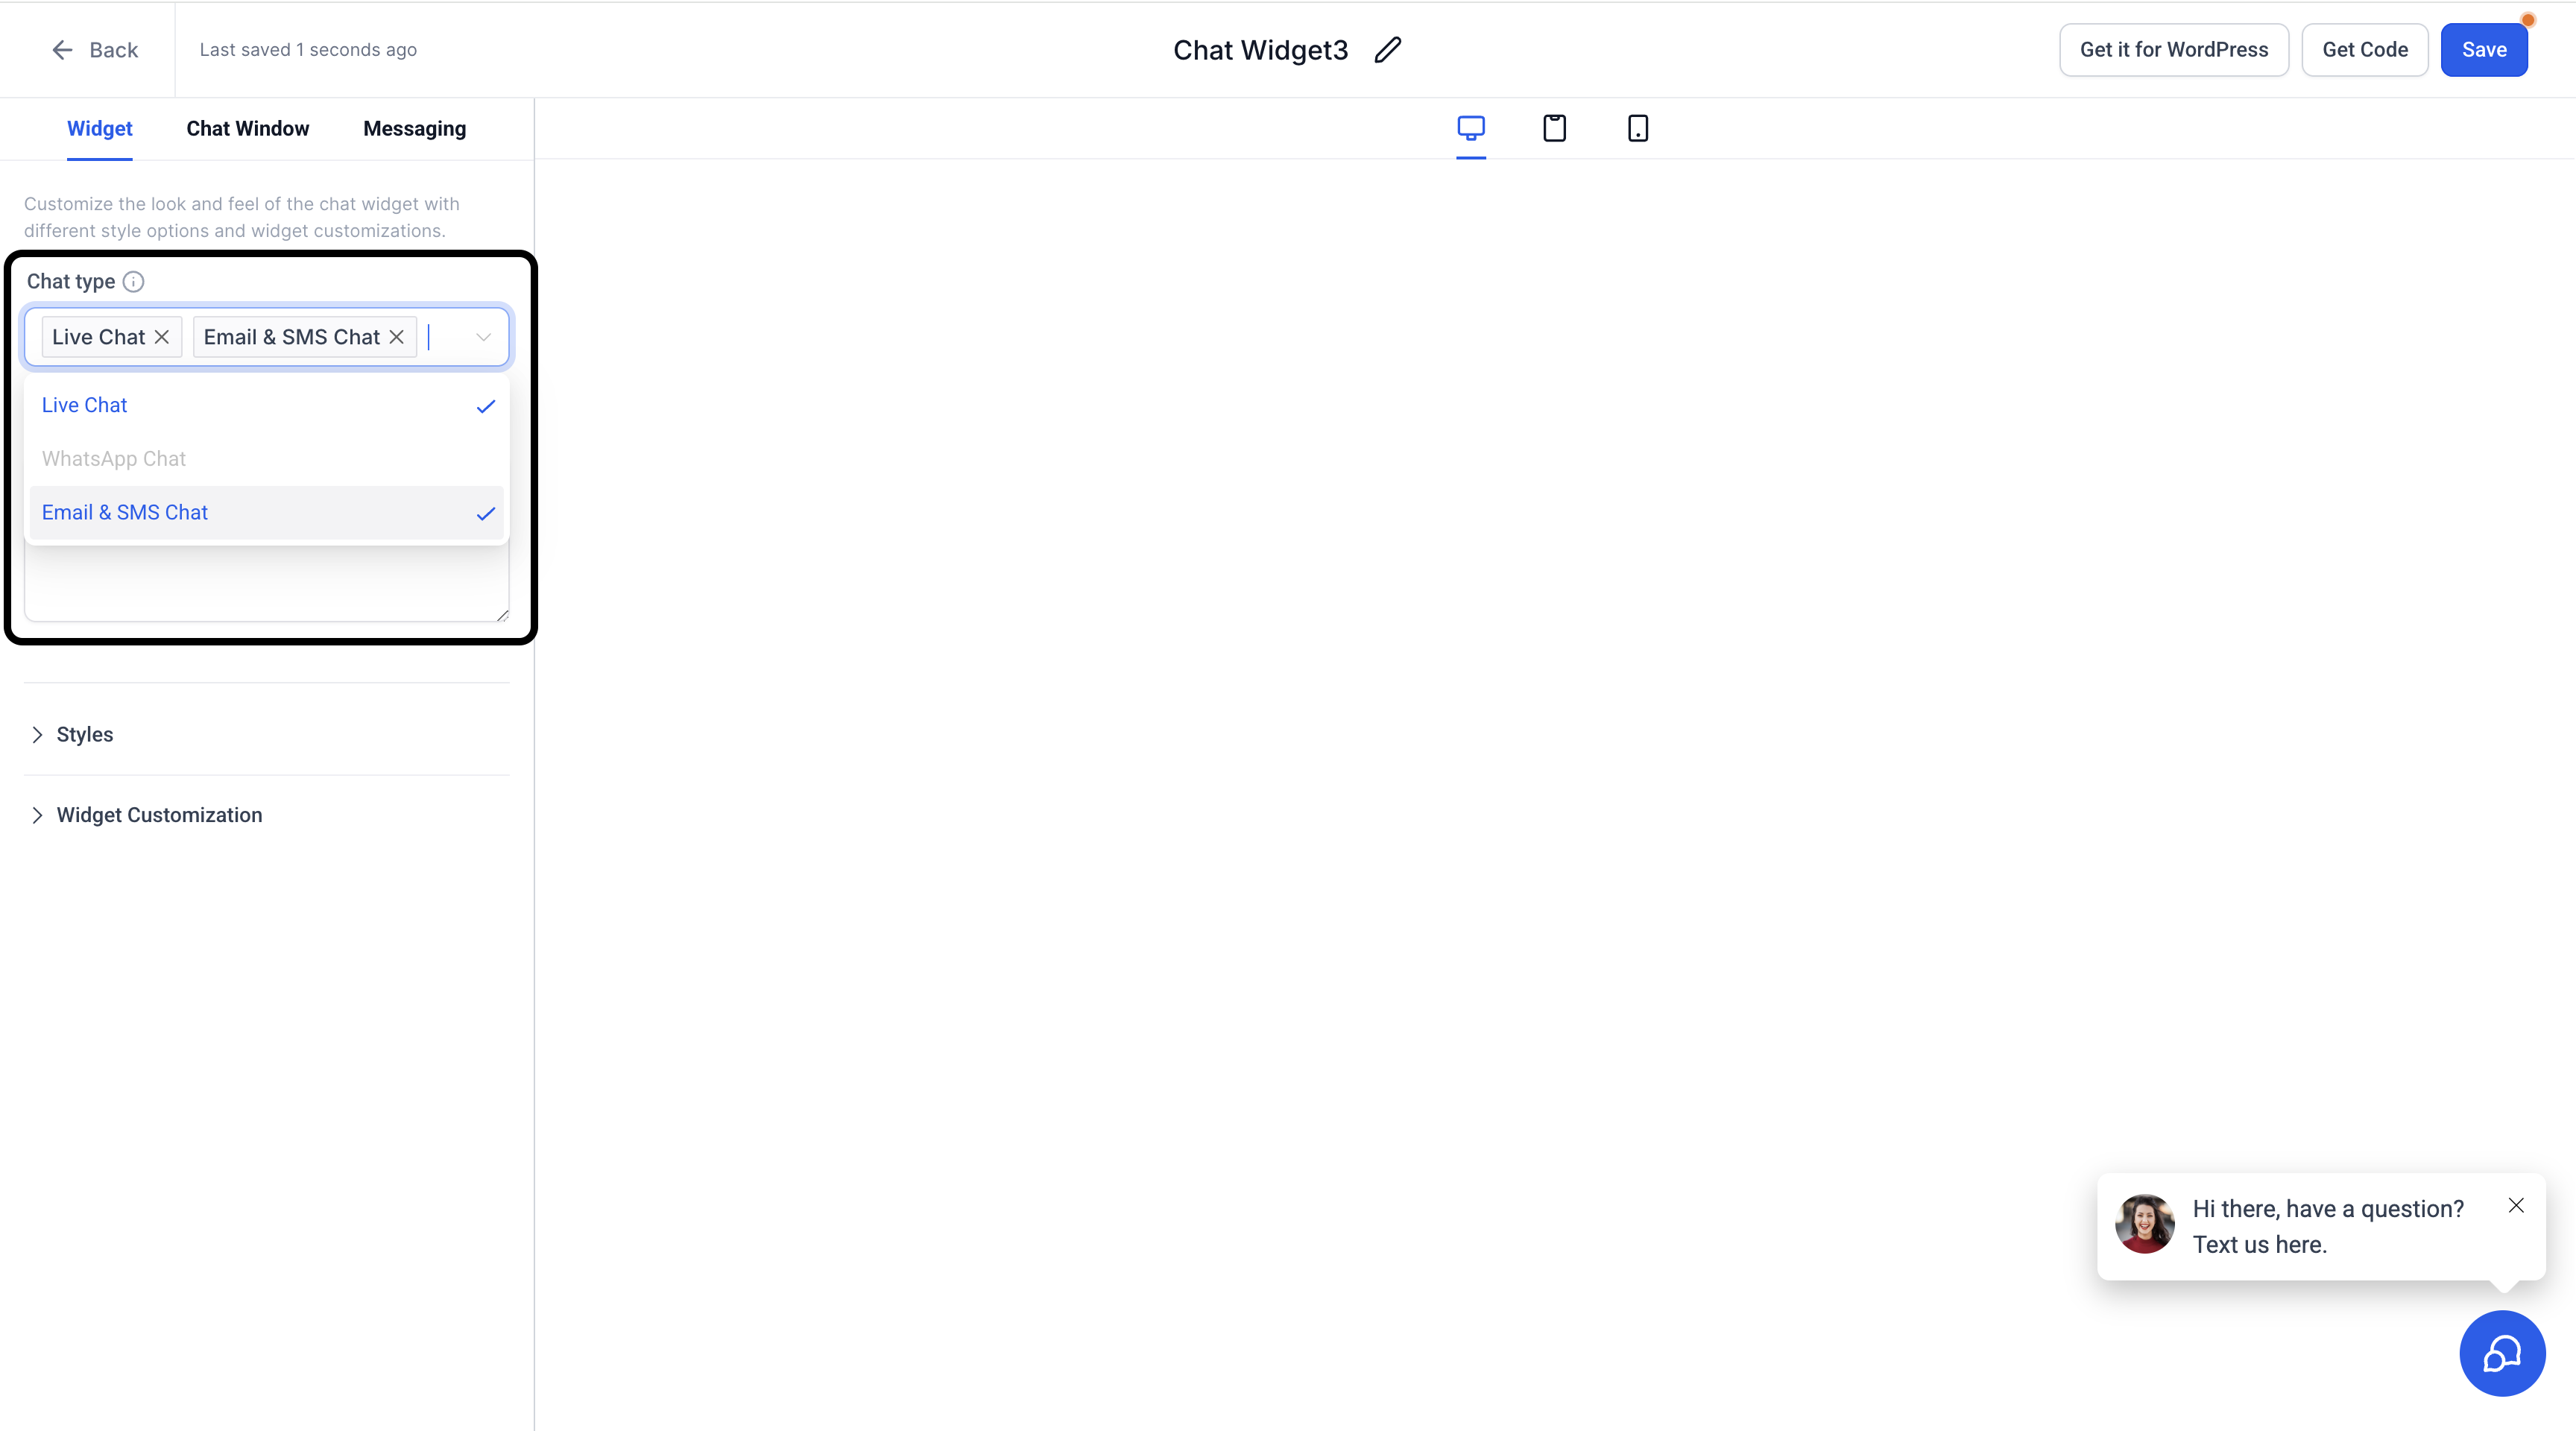
- Customize Widget Settings
- General Settings:
- Name your widget for easy reference (e.g., “Main Website Widget”).
- Configure widget color to match your brand.
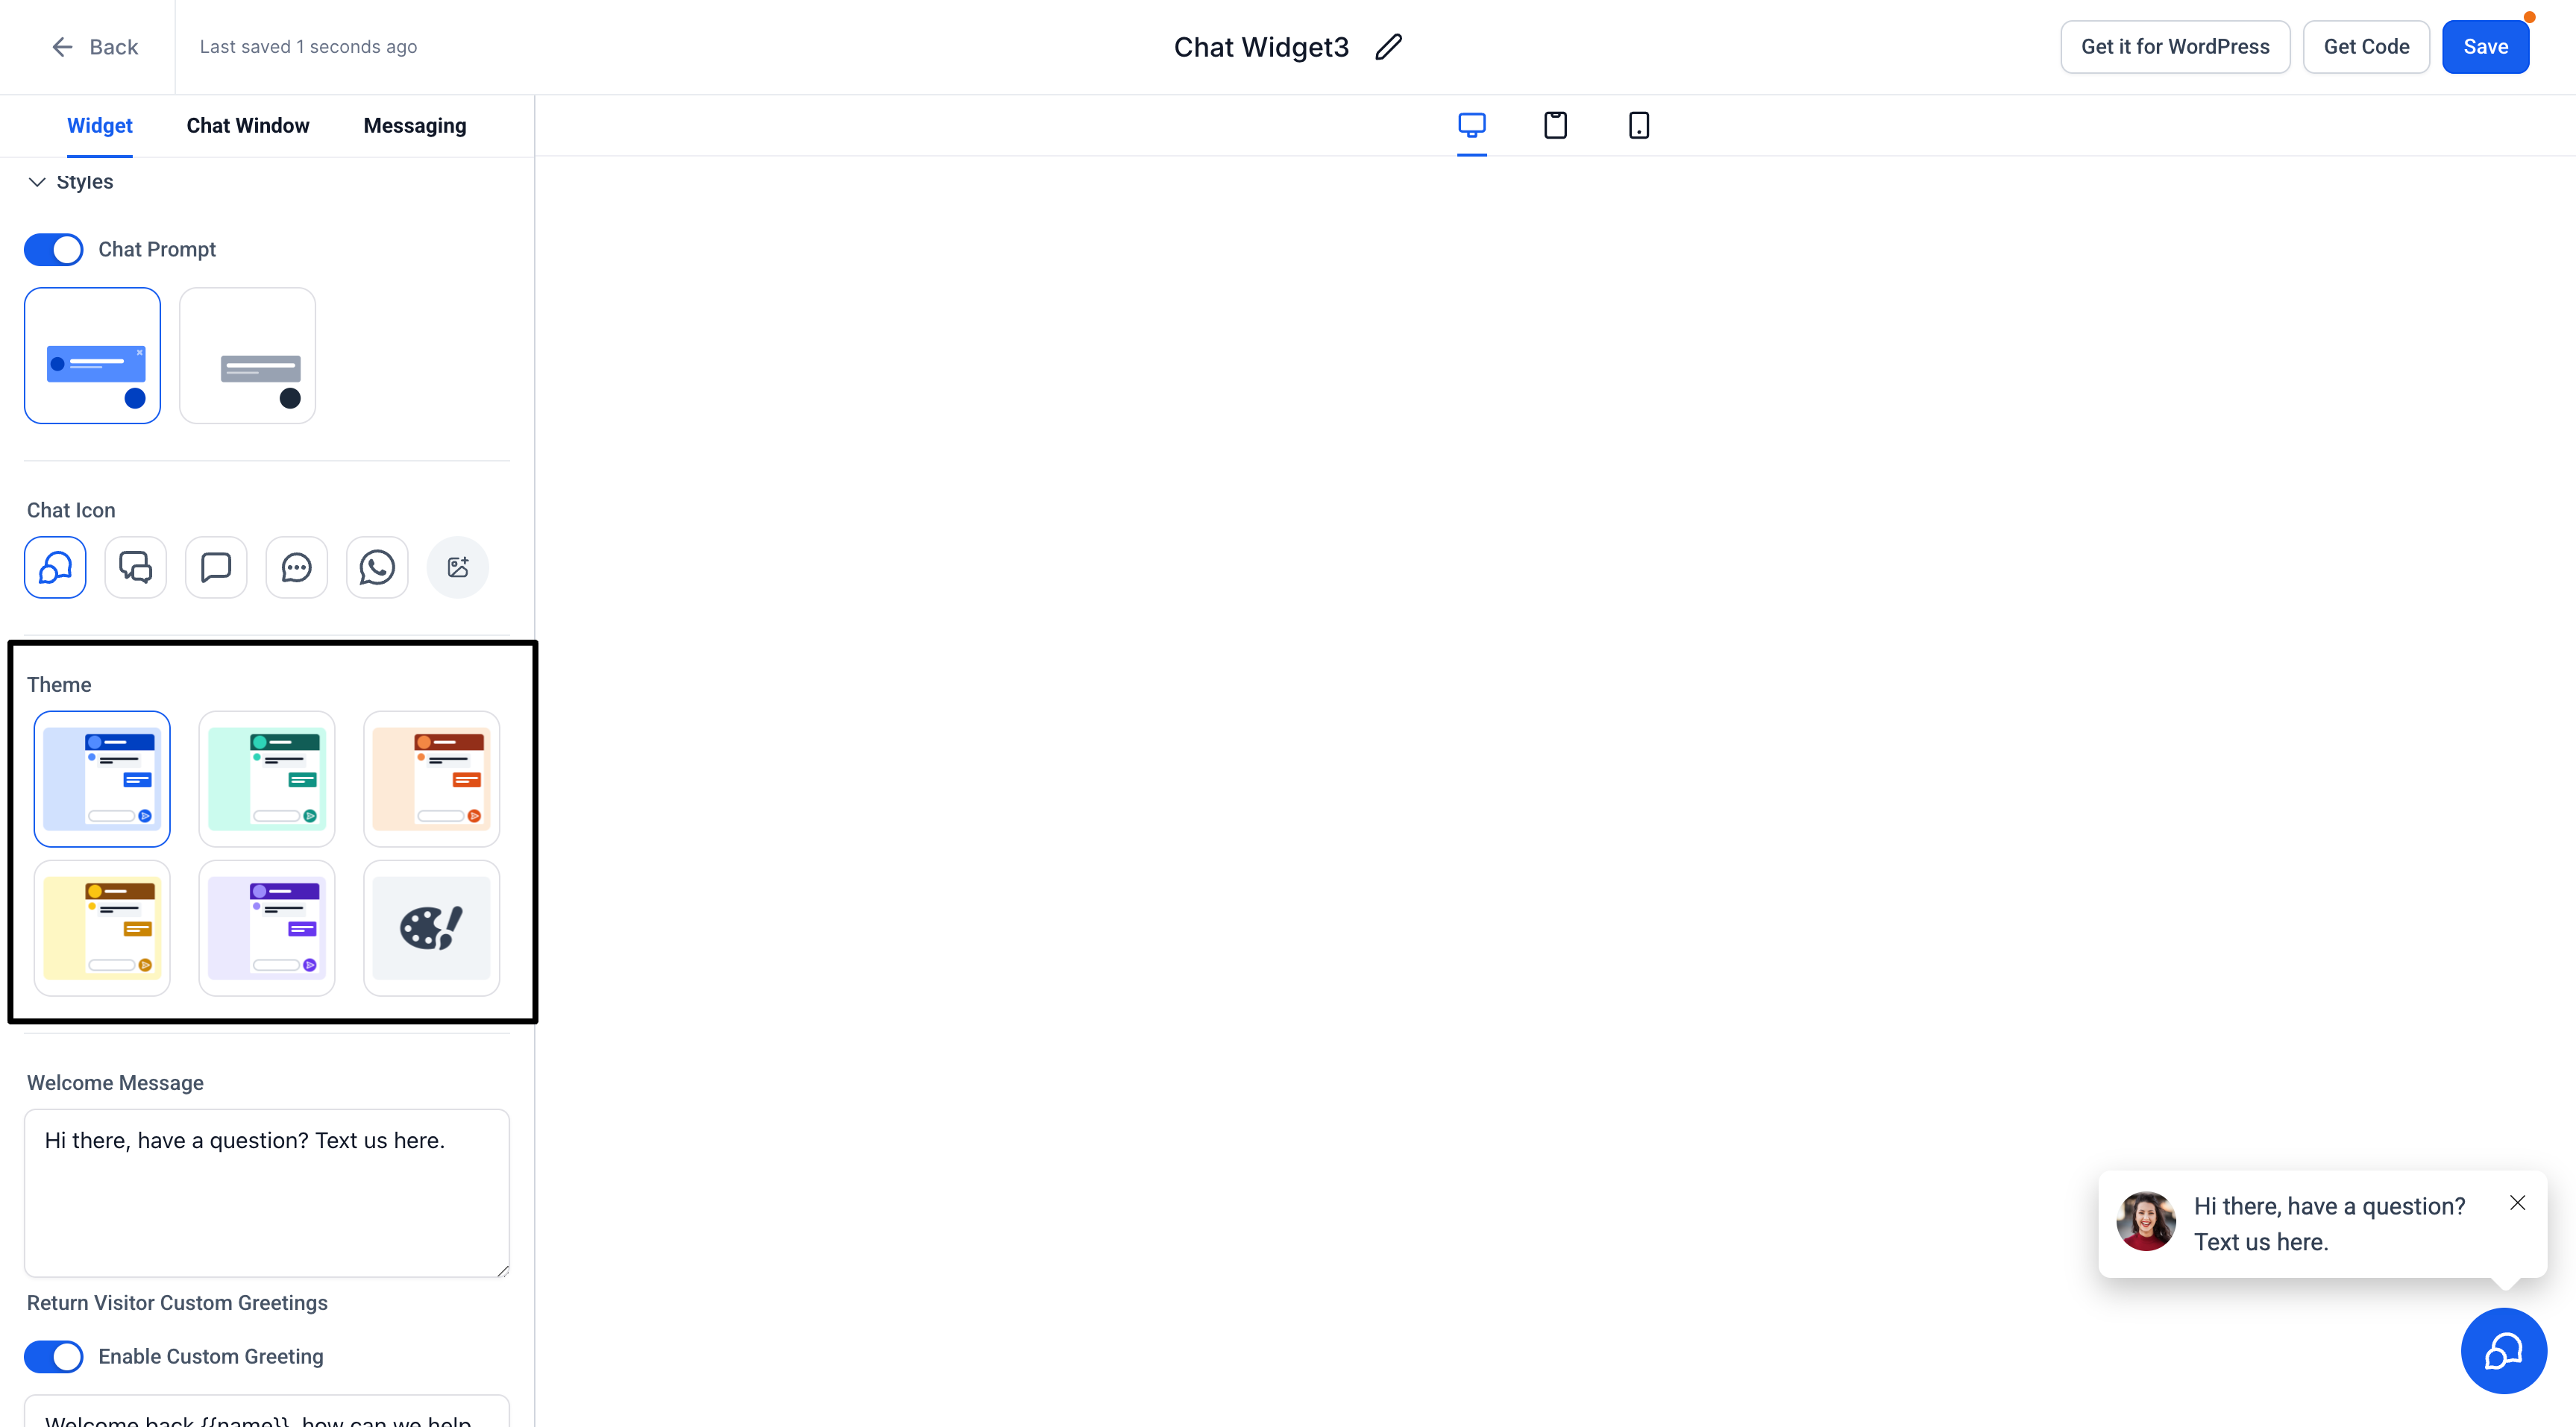
- Channel Settings:
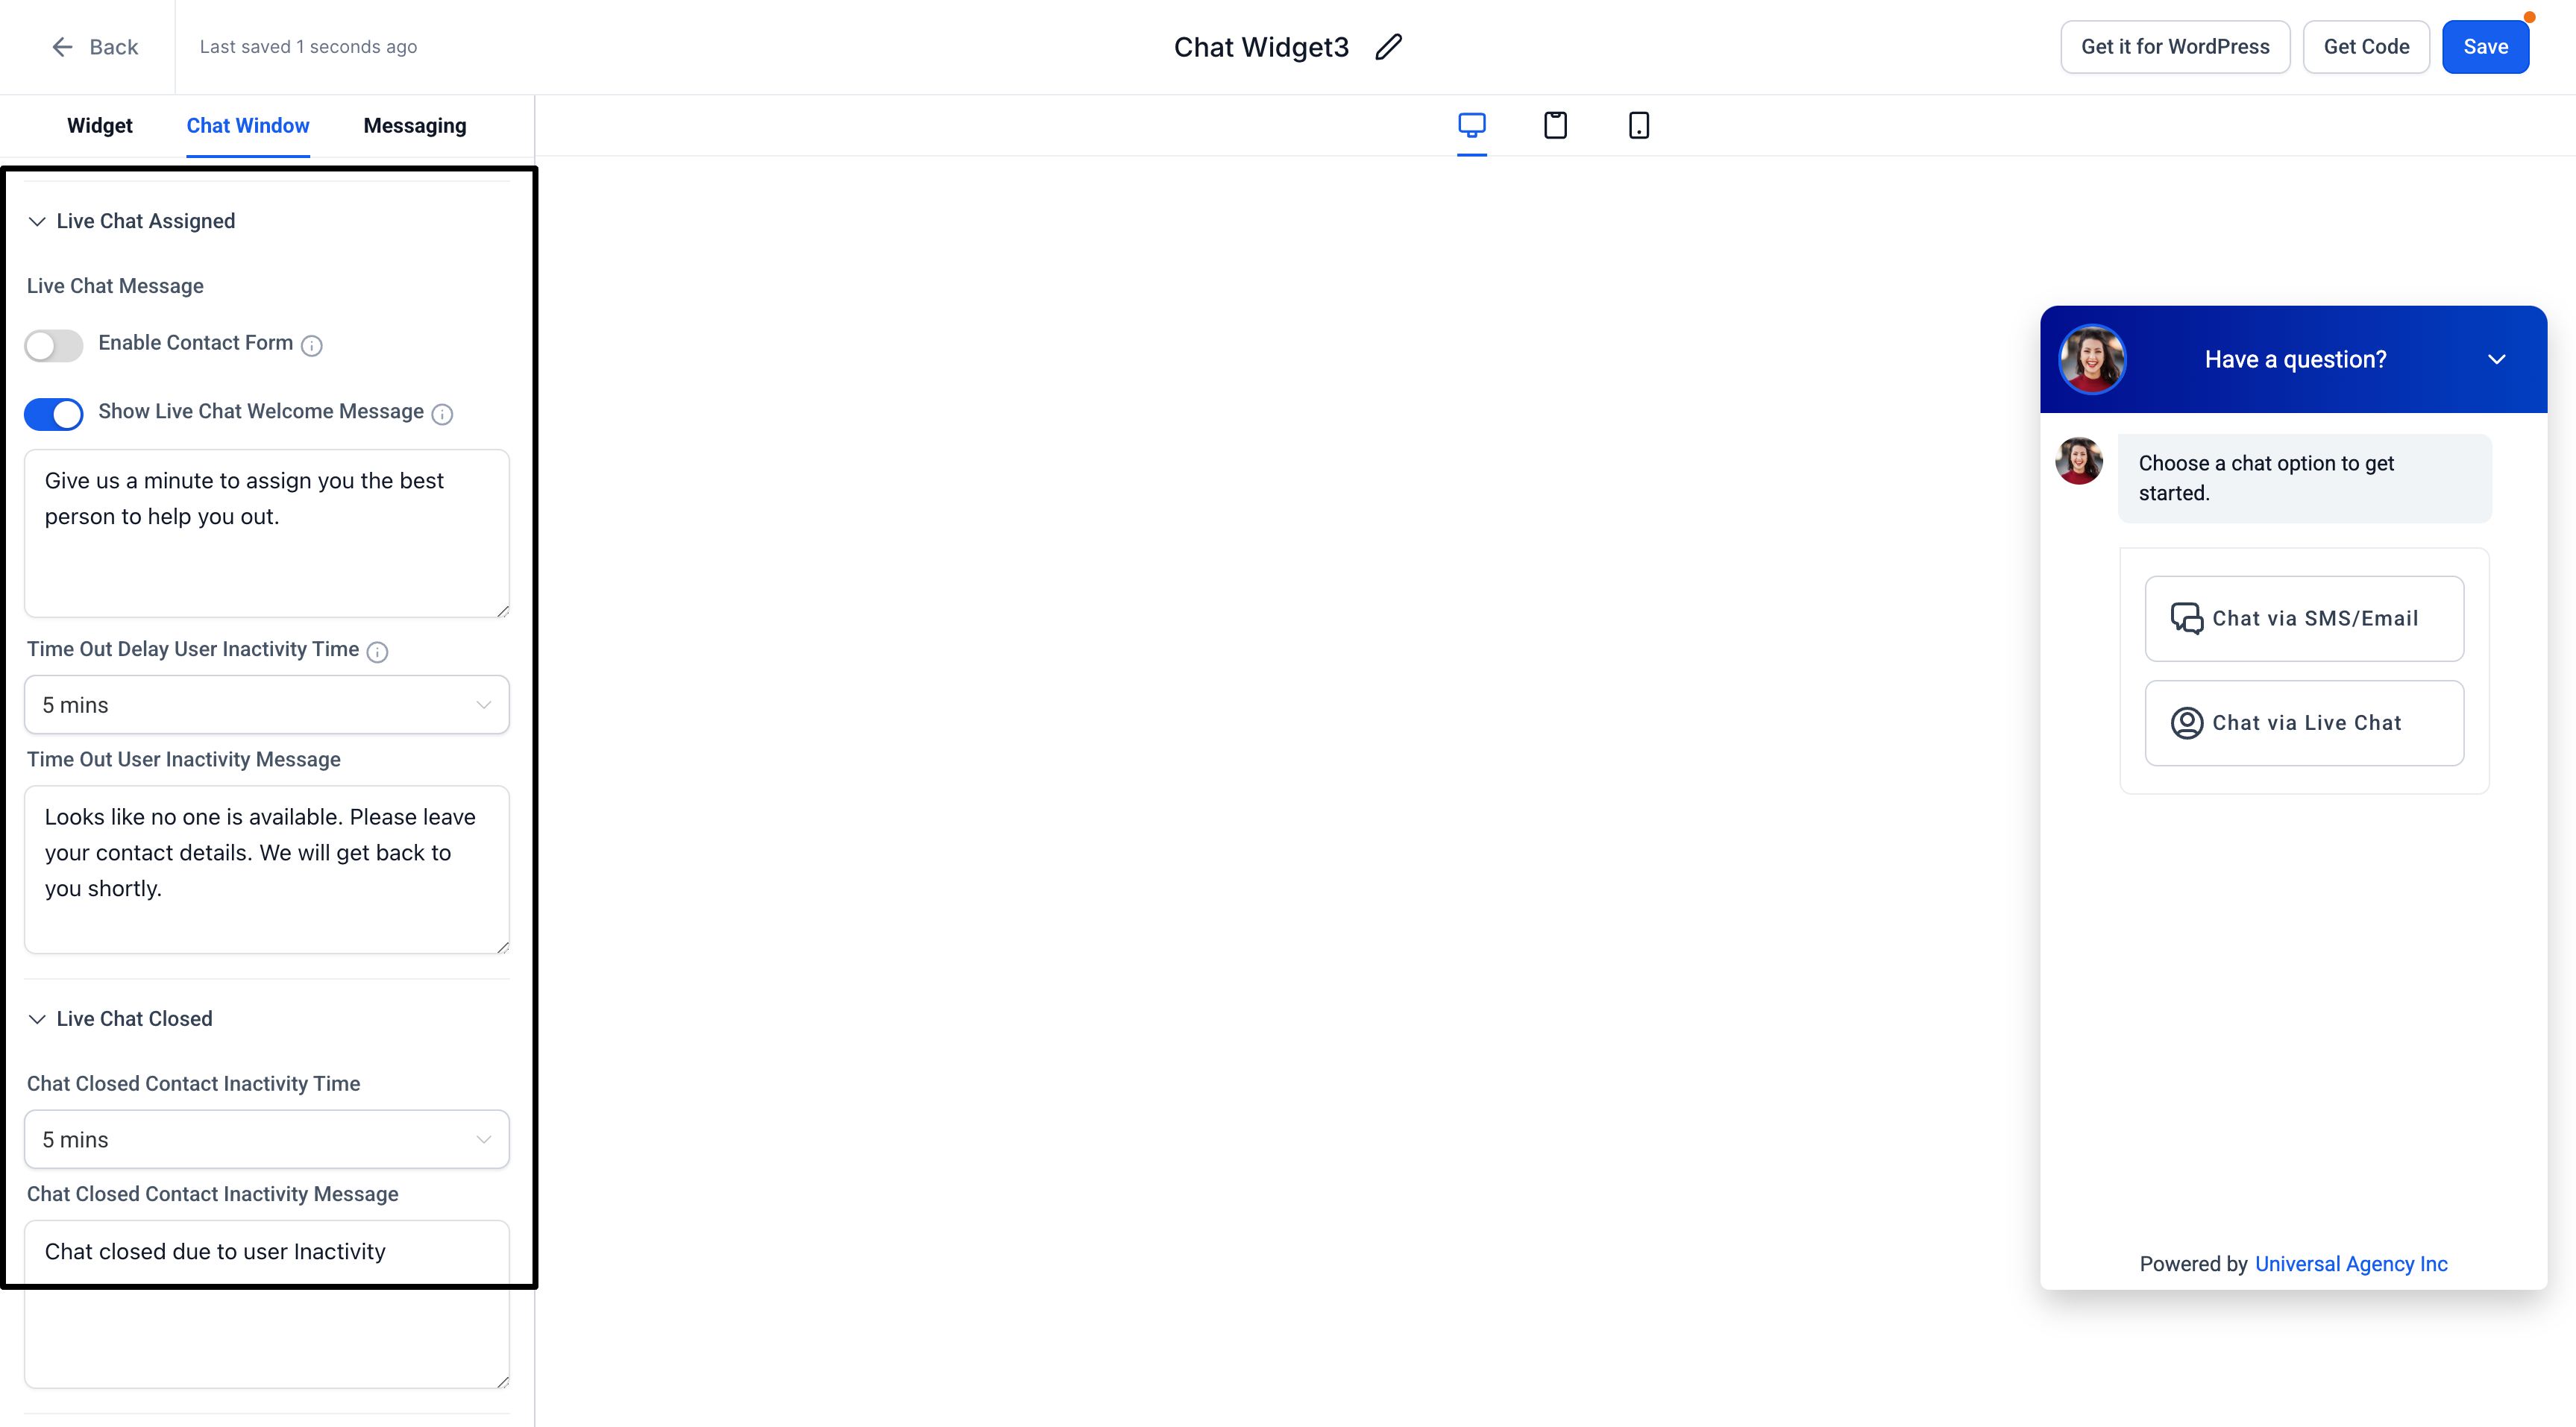
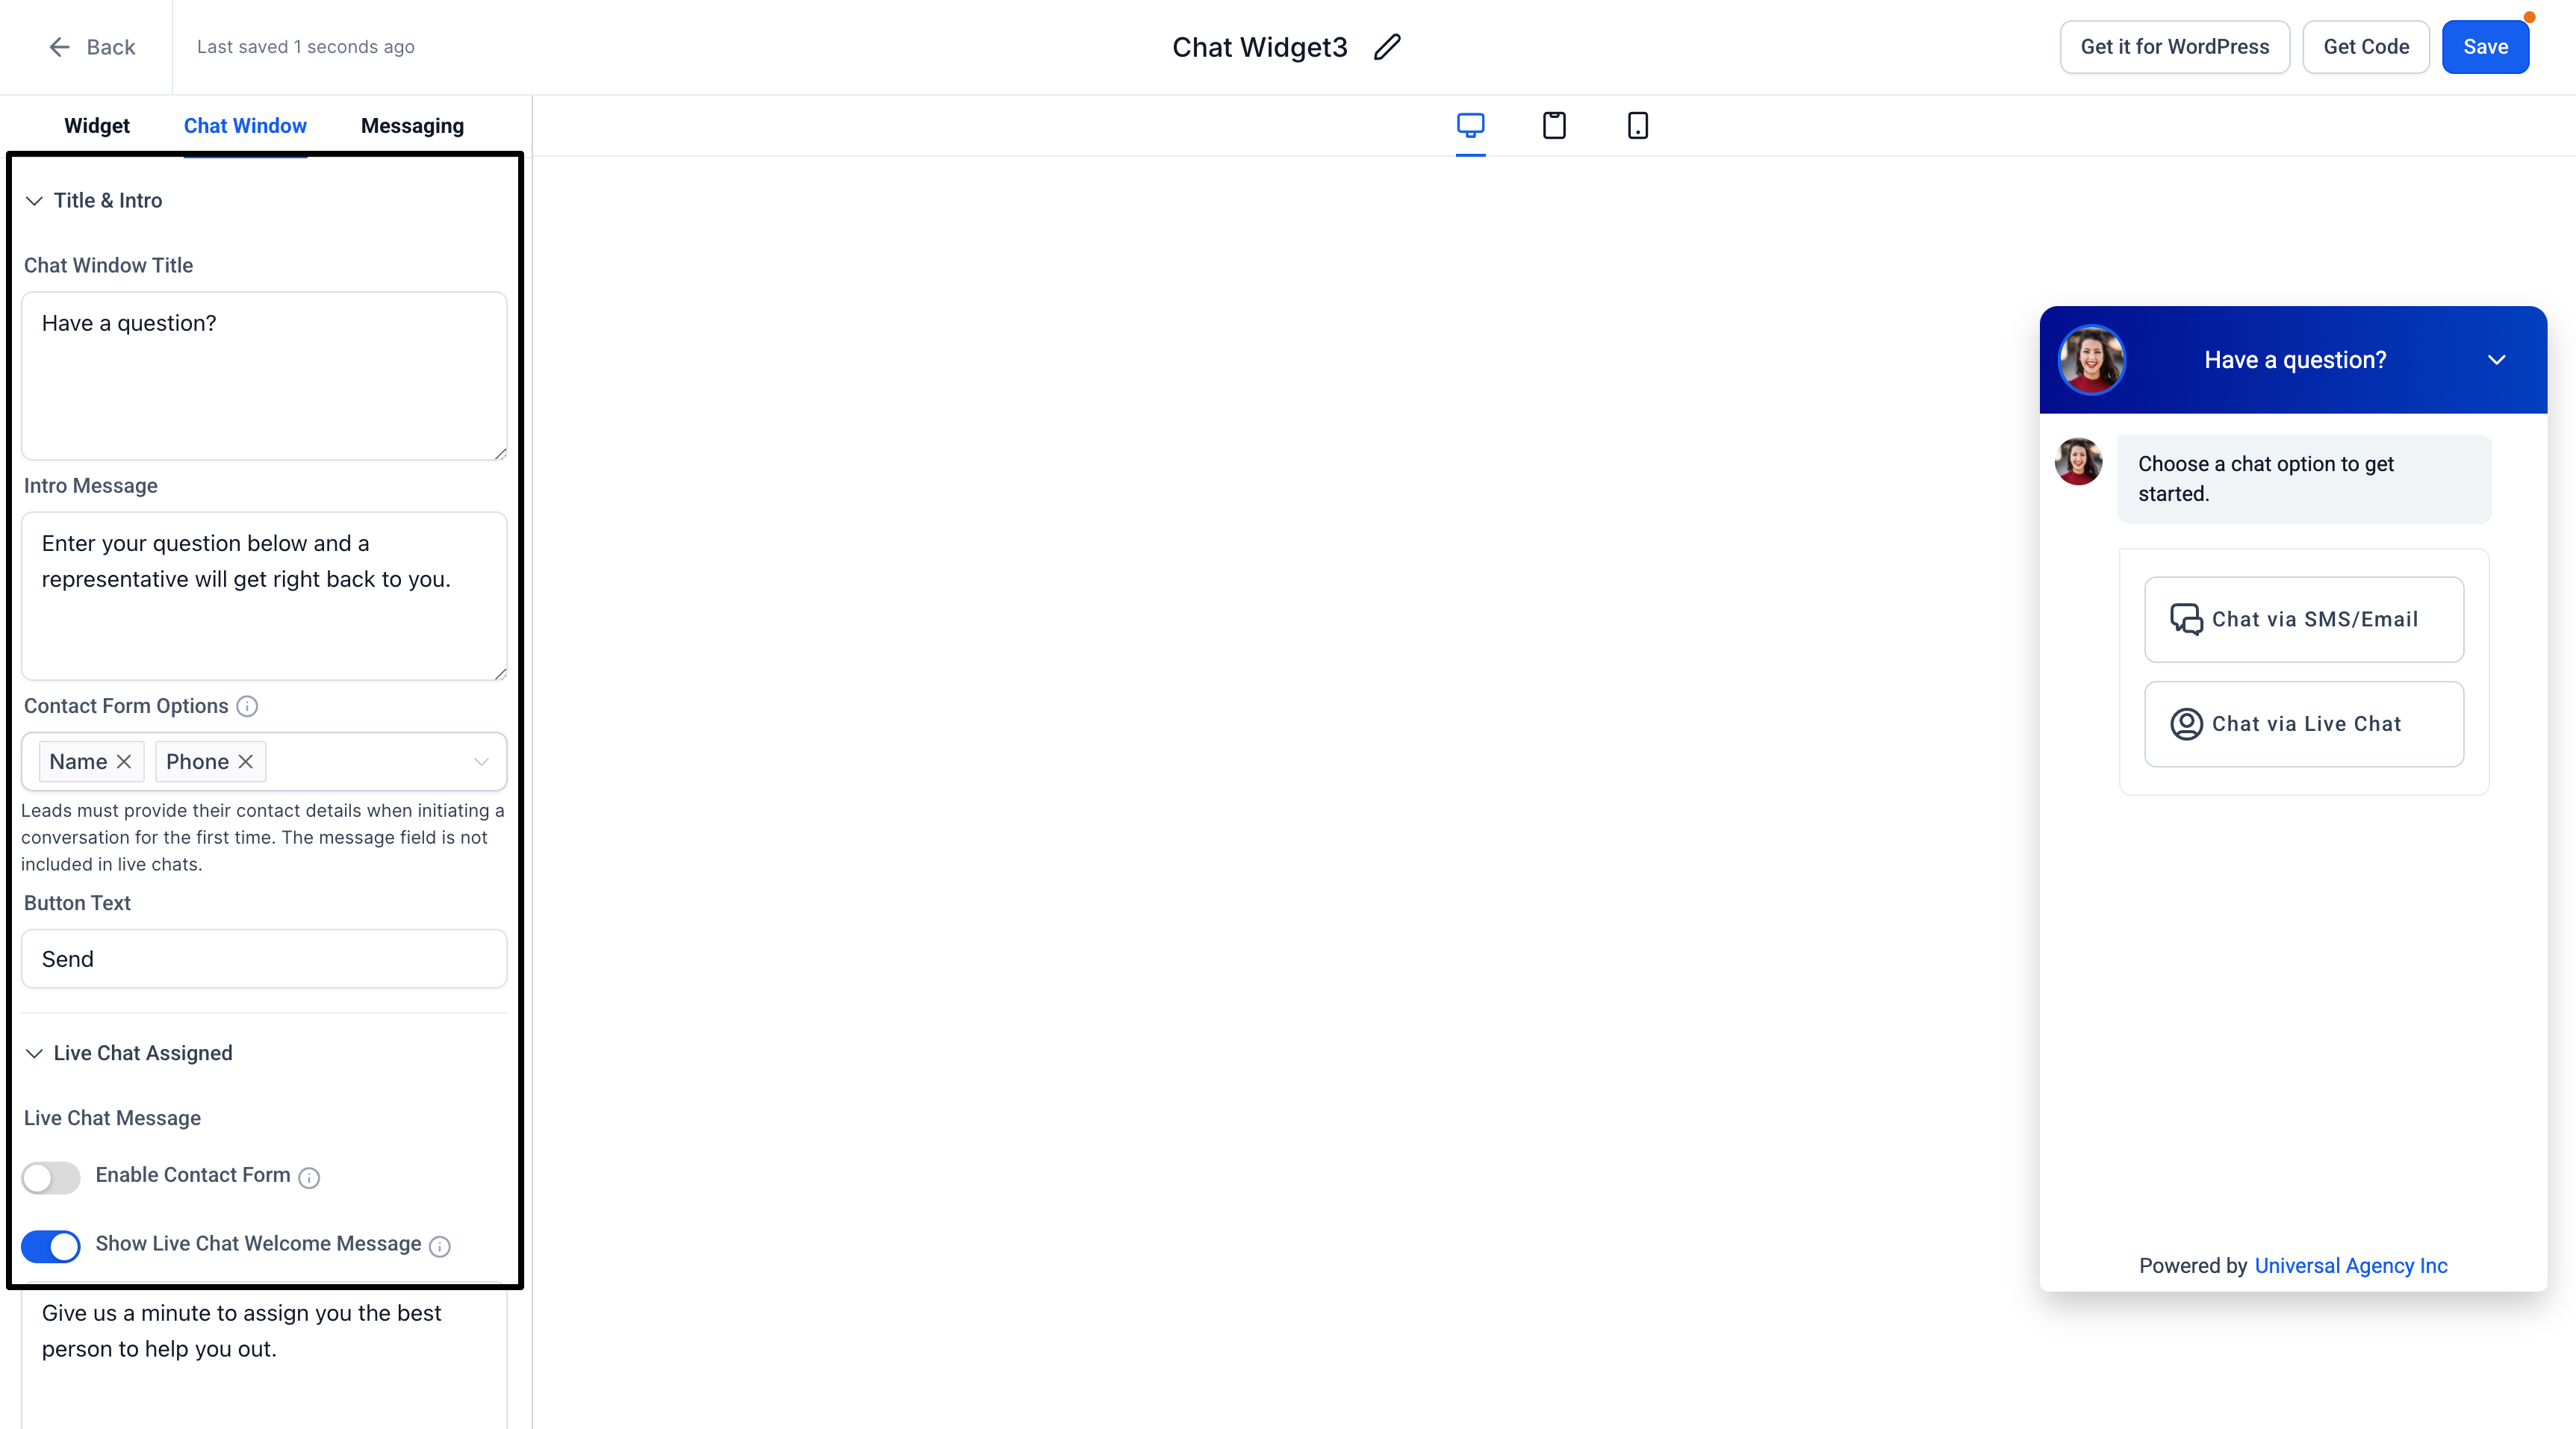
- Live Chat: Set your display name, greeting message, and offline behavior (if any).
- Email Chat: Add messages and customize the form fields to greet your users.
- WhatsApp: If enabled, confirm your WhatsApp number and default greeting message.
- Live Chat: Set your display name, greeting message, and offline behavior (if any).
- Initial Message: Personalize the message that appears when visitors open the widget (e.g., “Hello! How can we help you today?”).
- General Settings:
- Save and Preview
- Click Save to store your changes.
- Preview the widget on your website or within HighLevel to confirm that each channel is functioning as intended.
Using the All-in-One Chat Widget
- Switching Channels:
Visitors can easily switch between Live, Email, or WhatsApp Chat using the Back button in the chat header.

- Active Conversations:
Chat sessions remain active until manually ended by a sub-account user or closed due to inactivity based on your widget’s timeout settings. - Contact Form Fields:
For Email and WhatsApp Chat, a standard contact form field (e.g., “Message”) is available to capture user information.
Explore Zen Planner Engage Today
Give prospects and members an easier way to reach you—and watch your conversion rates climb.